
Training material and helpful references for FIRST Robotics Competition (FRC) software development.
TBD
Part 1
The last update made to the code was to simply get the motor to turn on. Instead let’s make the necessary code changes so that:
- The subsystem support methods for changing the motor speed (based on voltage applied) and direction.
- Reference https://docs.wpilib.org/en/stable/docs/software/commandbased/subsystems.html
- That commands are used to execute those commands in the sub-system.
- Reference: https://docs.wpilib.org/en/stable/docs/software/commandbased/commands.html
- That commands can be initiated and via a Dashboard or Shuffleboard:
- Reference: https://docs.wpilib.org/en/stable/docs/software/dashboards/index.html
Code we can try adding:
Constants.java
Comment out the setting of the motor power like below because instead we will control via commands
  public ExampleSubsystem() {
    ...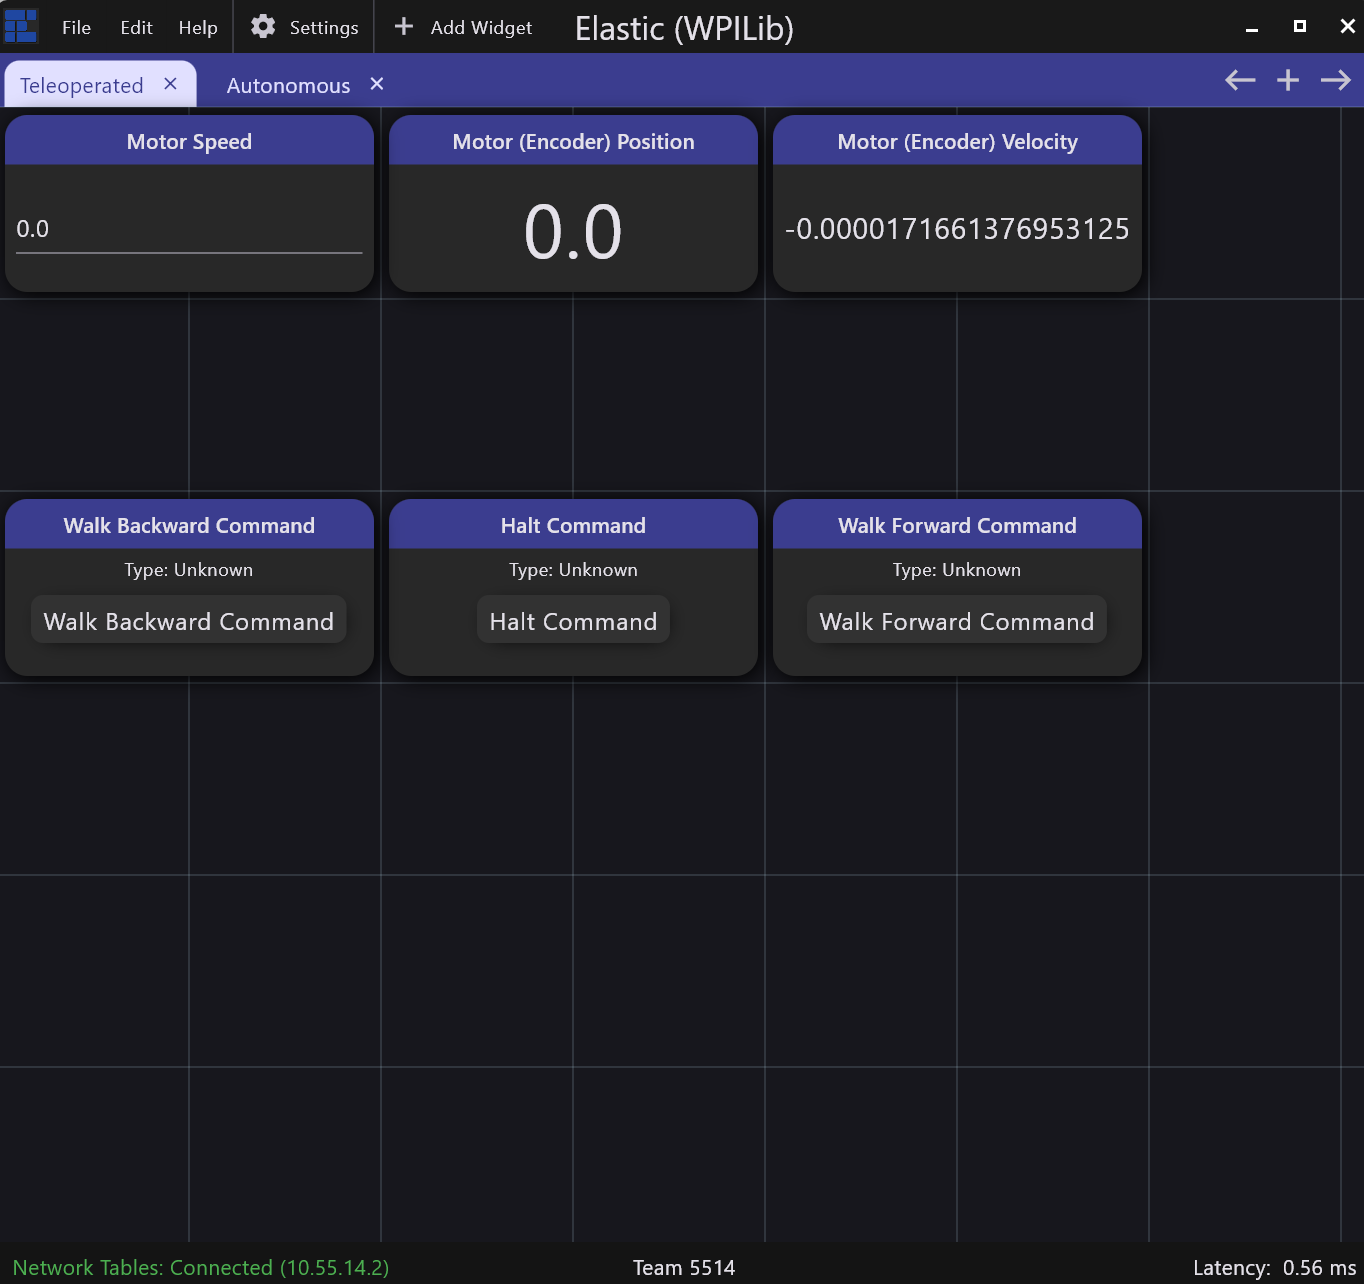
//motor.set(0.2)Now we will try using a different Dashboard that has more option and is better visually call Elastic, you can find it in the WPILib Tools area. Once it opens, try adding some widgets. For example here is mine:
—
Currently the motor’s speed and direction is changed using the .set() method. This just translates into a specific voltage applied to the motor.
- What if we want to spin the motor’s axle at a specific rate (velocity)?
- What if the motor’s axle was connected to arm where we wanted to move the arm to a specific angle (position)?
This requires a sensor called an “Encoder”. Lets consider the following steps required to add support Position:
- Add an encoder object to the subsystem that controls the motor.
- Add functions to the subsystem to get the encoder Distance measurement.
- Update ExampleCommand.java to implement a command requests we “CRAWL” to a specific distance within some tolerance.
- Add these commands to the “SmartDashboard”.
- Add support to run that new command using a joystick or some controller.
Code we can try adding:
ExampleSubsystem.java
ExampleCommand.java
Robot Container.java